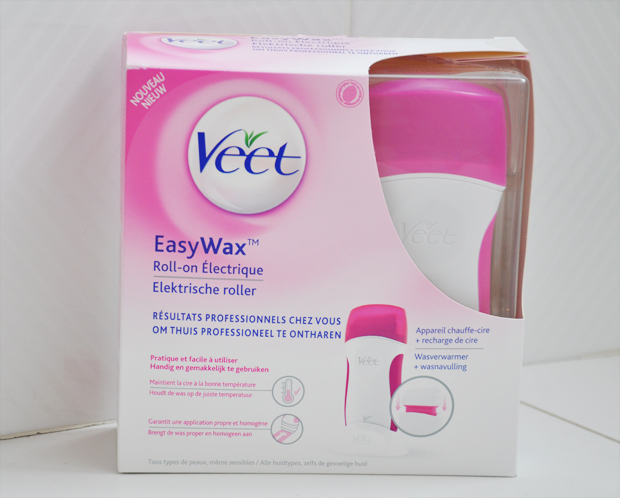
Today I’m going to discuss something totally different from what I’ve done before; depilation! It’s one of the little things in my beauty routine I hate to do, but needs to be done either way. Each and every time I’m shaving or waxing 2 things pop up into my head, 1) ‘guys are so lucky they don’t have to go trough the trouble‘ and 2) why doesn’t my body get that I don’t want any hair there so it doesn’t have to bother and make the hairs grow back?’. Ugh, it’s such a hassle I’d rather have someone else to take care of it for me. I usually get my legs waxed by my friend who owns a beauty salon. It’s cheap, fast and she does it really well! Occasionally I also shave in between when I feel like wearing a dress or skirt. When Veet asked me to try their new Easywax, I was curious to find out if I could achieve the same result at home. Let’s find out!
The Veet EasyWax kit contains:
- A self heating device and its cap
- A 50ml roll-on wax refill, specially designed for use on legs & arms
- 12 non-woven strips
- 4 post depilatory wipes
- A docking station to hold the device
- An electrical cable
- An instruction leaflet
The Veet EasyWax works in 4 steps:
1. ‘Insert the Veet refill with natural bees wax into the device and plug the electrical cable into the device and into the socket. The red light turns on to confirm the device is heating. Place the plugged device on its base and leave it connected for 20min. After 20min the wax should be ready for application according to the instruction leaflet’. It was not. I had to for another 15 minutes before I could actually get started. I keep the device plugged in during waxing so the wax doesn’t cool off.
2. ‘Apply the wax in the direction of hair growth (from knee to ankle for legs)’. This process doesn’t always run as smoothly. I have to press the roller onto my skin quite hard to get a nice layer of wax onto my leg.
3. ‘Immediately place the strip over the layer of wax, ensuring that there is at least 1cm at the bottom which is wax free. Rub the strip repeatedly over the wax in the direction of hair growth & remove the strip against the direction your hair grows’. The wax is super sticky and ends up all over the place. It takes a few tries before I get the result I wanted.
4. ‘When you have finished waxing, remove any wax residues from your skin with a perfect finish wipe (you can alternatively use the back of a used strip). THIS WAX CANNOT BE RINSED OFF WITH WATER’. The wax is actually really hard to get off, the wipes didn’t work on their own and I had to use some almond-oil after.
The verdict:
My experience with Veet Easywax wasn’t as I had hoped. There was plenty of pink wax on the strip but it took a few times before my leg was smooth. Even then there was still hair left, but I just couldn’t get it off. There aren’t enough strips in this kit to get you completely hair-free and the wipes don’t succeed in removing the sticky wax leftovers. The EasyWax is nice for when you have a lot of time and patience to wax your legs and you prefer to do it yourself. Unfortunately they don’t sell the wax refills for the bikini area in Belgium (why not?), so these are only for your arms & legs.
The Veet EasyWax kit costs € 18,99 and the wax refill retails for € 8,99.
*Kruidvat currently offers a 25% discount*


Jammer! in verpakking lijken ze wel kwalitatief! 🙂
Ik heb deze ook geprobeerd en was er eigenlijk helemaal niet tevreden van. Heb het teruggestuurd met de tevreden of terugbetaald actie. Blijkbaar ben ik dus niet de enigste waarbij het toch niet zo “easy” is 🙂
x Kimberly Epicwatchers
hm ja ben niet zot van al die spullen die veet heeft, heb al een paar dingen geprobeerd maar niet echt wauw…
Nathalie – http://curls-and-bags.blogspot.com