
With the current indian summer in full force it seemed like the perfect time to blog about my second attempt at some fruity-licious nails. This time, starring one of – if not my n°1 – favorite fruit: strawberries! Not an easy nailart to pull off, but with the right tools I’m pretty sure anyone can do it.
Tools:
- 3 nail polishes in red, green and yellow (mine are from Essie, Bourjois and Hema)
- scotch tape
- scissors (preferably pinking shears/sawtoothed ones), you can find these at any hobby store
- dotting tool (or a stippling nail polish/pen), mine’s from Yves Rocher
- correcting pen, mine’s from Herôme
Before I start, let me just take a minute to look at this gorgeous new Essie purchase that serves as my base for this nail art. Hipanema was part of the summer 2013 collection and it’s a pretty bright red shade with an orangey undertone and a nice glossy finish. It’s completely opaque in just one layer, but – as always- I prefer to use 2 just in case.

After the base is completely dry, it’s time for the real deal! Take a small piece of scotch tape and cut off the edges in the shape of a sawtooth to create the green leaves. You can easily do this if you have pinking shears. Do make sure they’re sharp though, otherwise you’re in for a lot of trouble. Of course you can do this with a free hand, but the pinking shears give the nail art a more cartoonesque effect.
Once you’ve cut all the pieces, you can stick them onto your nail, with the teeth close to your nail bed (and covering 80% of your nails). Make sure it sticks well before you start painting the 20% part green. Right before the nails are completely dry, slowly peel off the tape.

Now all there’s left to do is drawing the seeds with a yellow nail polish. I used one from Hema, which wasn’t really suitable because it’s quite sheer (but it’s the only one I have that comes even close to the color I needed), so make sure you have a thick opaque one. You can either draw them on by dipping a dotting tool in your nail polish and carefully pressing them onto the nail or you can use a special nail art pen/striping polish. Many brands like Models Own, 2B, Hema.. carry these nowadays so they’re not that hard to find.
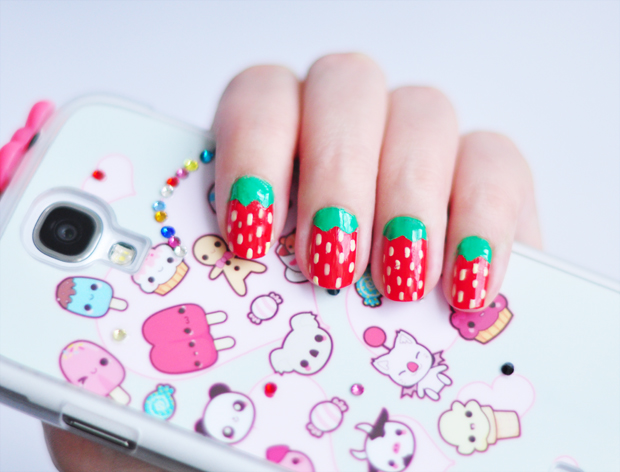
After that’s done you can use a correcting pen to remove any of the spilt nail polish and add a top coat for some more longevity and gloss if you’d like. The result should look somewhat like this:

What do you think of this strawberry nailart? Planning on giving it a go?
Need more fruity inspiration? Have a look at my watermelon nails.

ohla love it! superleuke nail art, lekker cute
Ik ben zo jaloers op je nagels & skills, mooi gedaan!
Naomi, x