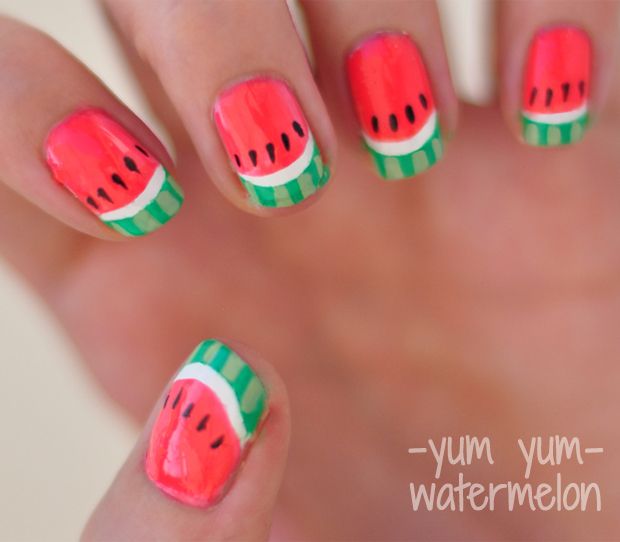
Summer’s here! So why not give your nails a nice colourful touch by making them look like one of the best fruits the summer season has to offer: WATERMELONS! The yum! Here’s how to make your nails look nice & tasty thanks to this watermelon nail art:
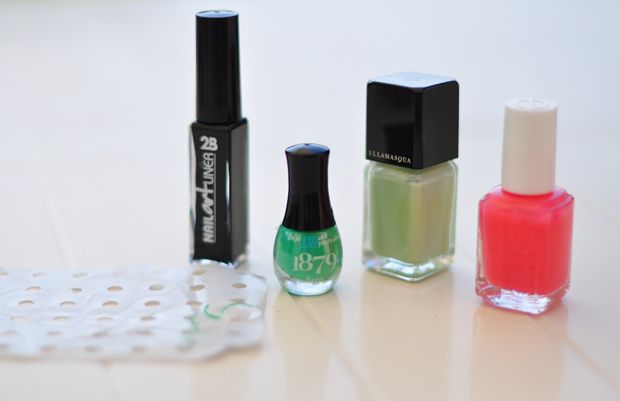
Tools used:
– reinforcement stickers (school supplies)
– Essie ‘Blanc’ nail polish: an all white shade
– 2B nail art liner in ‘black’
– Bourjois mini nail polish (special 150 years edition: ‘1879’): a bright green
– Illamasqua ‘Milf’ nail polish: a light (almost pastel) green
– Essie ‘Cute as a Button’ nail polish: a bright coral pink shade
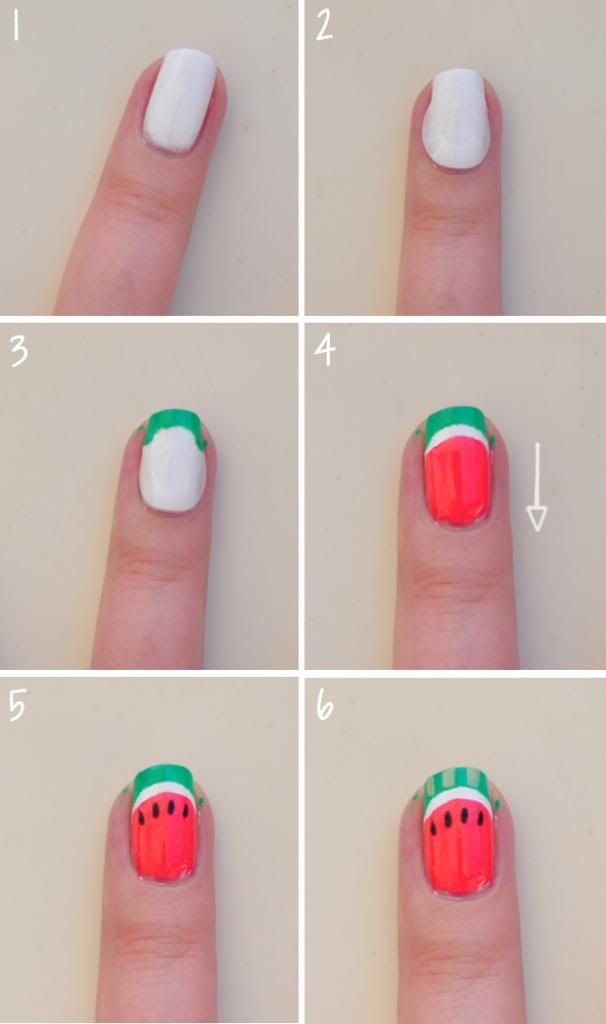
1. To get started, paint your nails white. The number of layers depends on the quality of the nail polish. Just make sure the tip is opaque. With Essie, 2 layers should do the trick.
2. When completely dry, put a sticker onto your nail, leaving about 80% of your tips uncovered.
3. Paint the bare tip with the dark green shade. Before the nail polish is completely dry, gently remove the sticker.
4. Grab yourself a steady hand because this part is tricky! Take your coral shade and draw a horizontal line parallel to the green one and then quickly paint downwards over your nail.
5. Time to add the watermelon seeds using the fine tip of the black nail art pen. You can also use a dotting tool or a toothpick for this step.
6. Lastly add the stripes of the watermelon rind by gently painting a few short lines on the bright green tip using a light green shade. Et voilà, your nails look nice and juicy for hot summer weather!
What do you think? Care to try these out?


haah heerlijk voor de zomer, echt superleuk en het ziet er nog doenbaar uit
Author
Ja idd, het vergt een beetje oefening maar uiteindelijk is het wel heel simpel. Voor mij hoeft het ook allemaal niet te moeilijk te zijn, ik heb daar geen geduld genoeg voor 😀
Superleuk idee, mooie uitvoering!
Naomi, x
EEE this is so dang cute!!! I MIGHT be able to do it on my left hand, but it’ll be tricky to do it on my right hand. Maybe I’ll try on one fingernail or two to begin with. Thanks for the great tutorial!
Author
Haha my left hand always looks better than the right one, but practice does help. Or you could always ask someone else to do your right 😉 I’m curious to see the result 🙂
Aw, wat een schattige manicure 😀 Perfect voor nu in de zomer.
Oh wat een leuke nail-art! Wil ik zeker eens proberen 🙂
Super+cute,+en+perfect+voor+de+zomer,+een+echt+kunstwerk+!
Oh my, you’re good at this! And a proper white it is, I’m sold!
X Alice