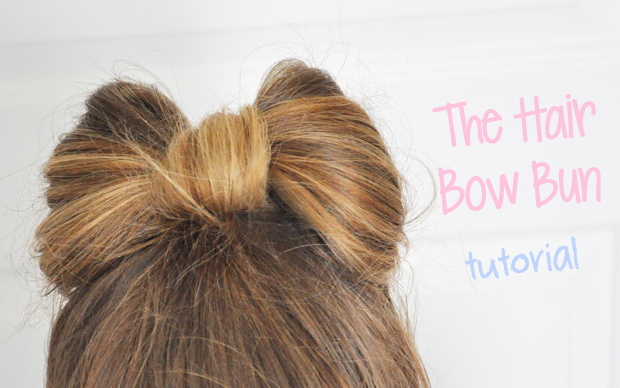
Looking for some change without having to cut your hair? There are a lot of simple hair styles that can do the trick! Today I’m going to show you how to create a super-cute hairstyle; the hair bow bun!
TOOLS:
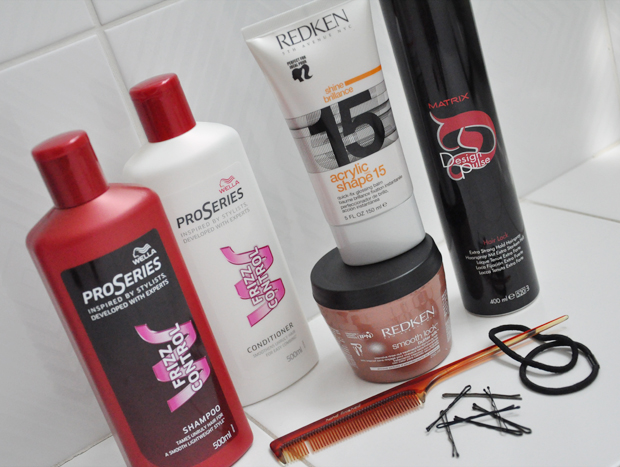
Wella ProSeries Frizz Control Shampoo (500 ml) € 3,99
Wella ProSeries Frizz Control Conditioner (500 ml) € 3,99
Redken Smooth Lock Butter Silk Intensive Rince out Treatment (250 ml) € 33,80
Redken Acrylic Shape 15 (150 ml) € 21,60
Matrix Design Pulse Hair Lock Extra Strong Hold Hairspray (400 ml) € 16,20
Hair elastics and a lot of bobby pins (preferably in a shade that matches your hair color)
A comb
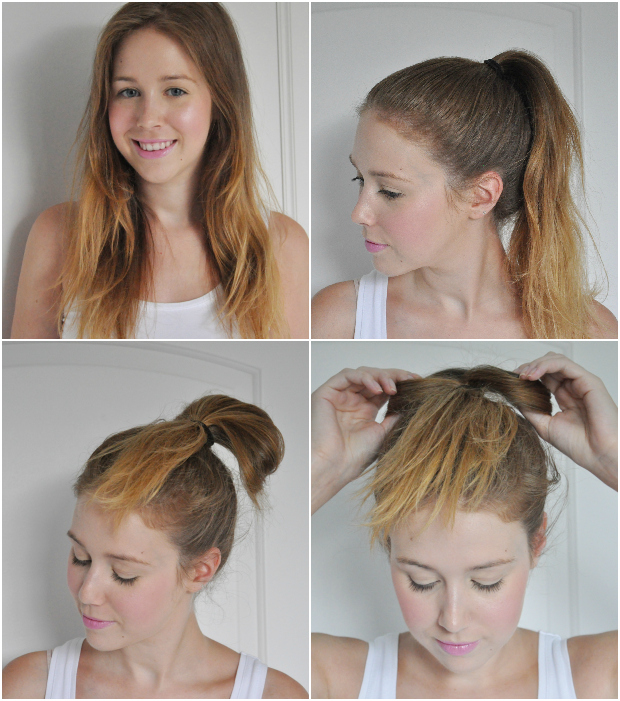
1. Preparation is everything! Because my hair is super frizzy after washing it, I have to use a lot of products to tame it and make it silky smooth. I used the Wella Frizz Control shampoo and conditioner, followed by the Redken Smooth Lock mask. Silky smooth hair is required for this look.
2. Rub a bit of Redken Acrylic Shape onto your hair to get rid of the last fluffy pieces. I only used the product in the front to show you how much of a difference it really makes. Tie your hair into a high pony tail with a firm hair elastic. You can choose how you want to tie it, depending on where you would like to have your bow.
3. Put another elastic around your hair, twist it and push it over your hair, making your pony tail rest on the top of your head as shown above. Pin it down with some bobby pins just under the elastics if necessary. The shorter the end of your pony tail, the bigger your bow will be.
4. Divide your bun into 2 equal parts.
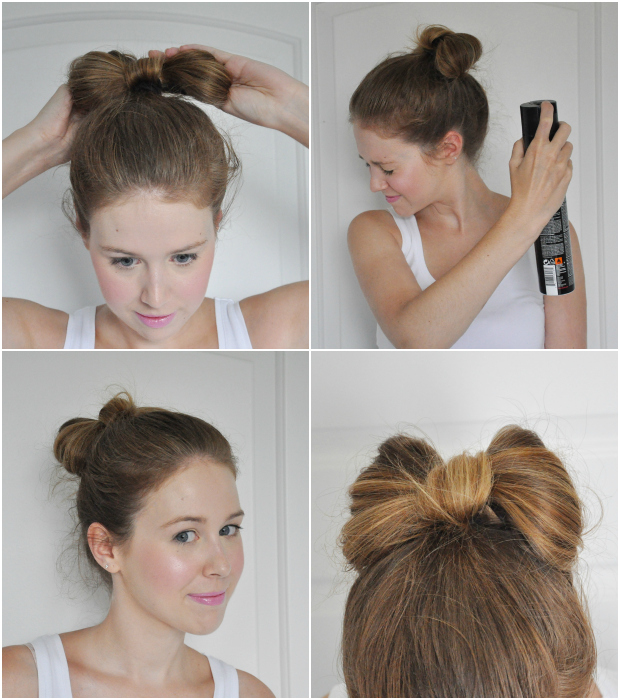
5. Take your pony tail and pull it back over the elastic and in between the two parts you just made. Pin it down with bobby pins in the back and hide the tip of your pony tail by tucking it in the bow with pins.
6. Attach the lower parts of the hair bun to your head using more bobby pins and adjust the bow until you get the shape you like. Fix with hairspray.
7. The cute hair bow bun is done. That was easy! 🙂


hihi, grappig, heb ik ook ooit gemaakt! Leuke en mooie foto’s, je make-up ziet er super uit!
leuk! schattige tutorial en mooie fotos!
i love love love your fresh make up! want a tutorial about that too! gorgeous hair-do! unfortunately i cannot do that!!!
Author
Thank you! I didn’t know wether that would’ve been interesting to post about, since it’s a pretty simple look 😀 Since you’re asking so nicely, consider your wish granted!
Want to try this for such a long time now! 😀 It looks super cute and really well done on you, great!
<3
Zo een leuke look! Ik heb het ook al een paar keer gedaan.. En er vragen altijd zoveel mensen hoe het moet 😀 En je ziet er echt mooi uit! Leuke neutrale make-up!
Met mijn korte haar gaat dat niet lukken maar ik vind het wel heel cute staan.
Zo leuk gedaan! En je make up ziet er zo mooi en fris uit!
Amazing!! I’ve tried doing it but my hair has too many layers and it’s too sleek, and it just kept falling out of the bow :/ But it looks gorgeous on you 🙂 xx
http://www.fashionistasdiary.com
Pretty make-up look darling!!!
super!+wil+ik+ook+wel+eens+proberen!+heb+het+al+vaak+gezien,+maar+nog+niet+zelf+geprobeerd.+je+ziet+er+leuk+uit+trouwens,+volg+je+blog+nog+niet+lang.+leuke+blog!
Heb+je+die+van+mij+al+es+gezien?+http://thestyleavenue.blogspot.com